Types of invoicing on the eMAG Marketplace platform
When you receive orders, you can quickly generate an invoice directly from the eMAG Marketplace platform. One of the main advantages of the invoicing service is that you no longer need to manually add invoices for each order processed on the platform.
Automatic Invoicing
To activate the invoicing service, go to My Account – Profile section and click on the Services tab.
In the new section opened, you need to press the Activate 3P service button to fill in all the necessary data.

- If you check the option for automatic invoicing during the configuration of the invoicing service, then invoices will be automatically generated directly from the platform.
- When an order is finalized, the corresponding invoice containing all the active products from the order will be automatically generated. By default, invoices are issued in the currency of the country in which the seller sells.
- When the customer requests changes to the billing details, you have the option to cancel the invoice to fill in all the necessary data.
- In case the customer wants to return items, an automatic return invoice will be issued containing the returned products. It is important to wait for the automatic invoicing for returns. You do not need to press the Reverse Invoice button to avoid duplicating the return invoice.
- If only one of the items from the order is returned, an automatic return invoice containing the returned product will be issued.
Manual Invoicing
If you opt for manual invoicing when configuring the invoicing service, then you will manually issue an invoice for each finalized order on the platform. The same applies when canceling an order.
Manual issuance of an invoice:
- At Order level
- Go to the Orders section and identify the desired order.
- Click the Show details button in the last column.
- Access the Upload Attachment button.
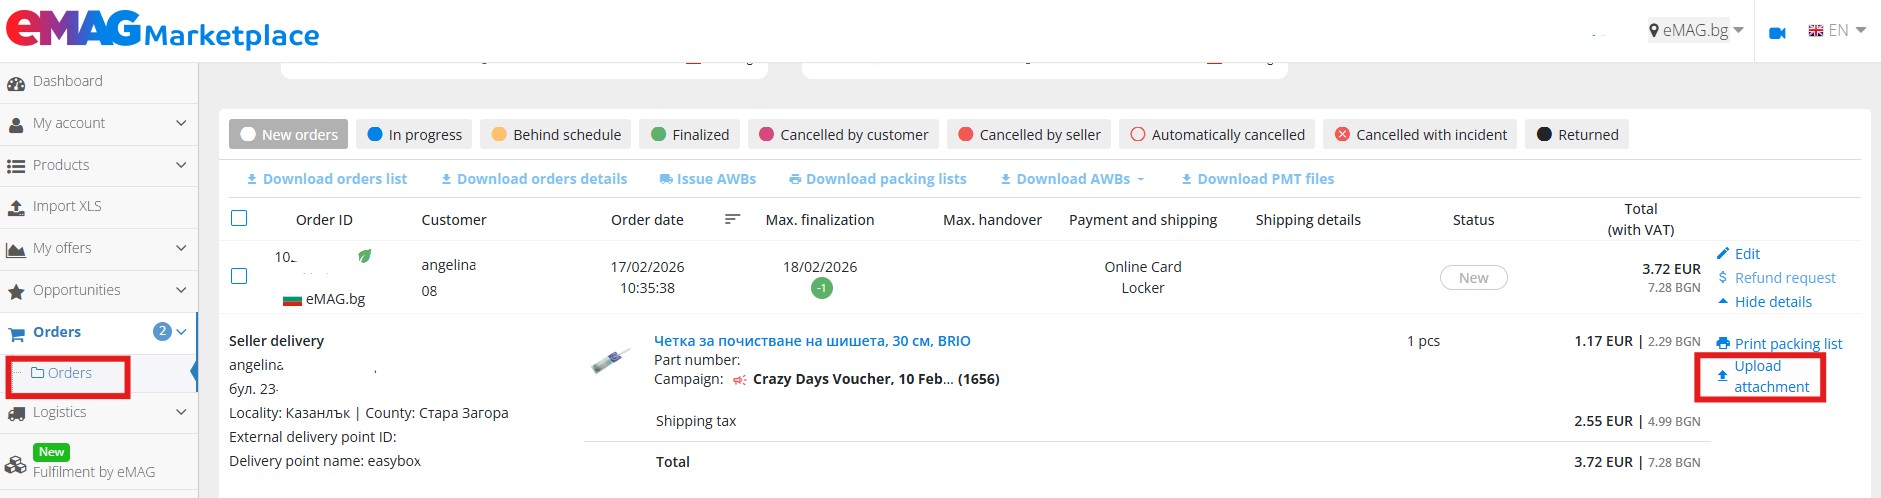
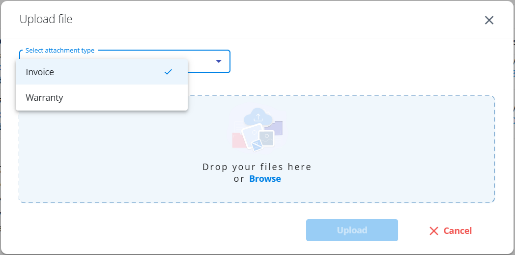
- By accessing the Upload Attachment, you can select the desired document type for upload:
- Invoice – if you want to upload the invoice related to the order, this option is set as default when using the upload button.
- Warranty – if you want to upload the product warranty, you must select the Warranty attachment type from the available list. For orders with multiple products, you will first need to select the product for which the uploaded warranty will apply.
- Check the order details and click the Upload button.
- After issuing the invoice, it will be available in the customer’s account.

- By accessing the Upload Attachment, you can select the desired document type for upload:
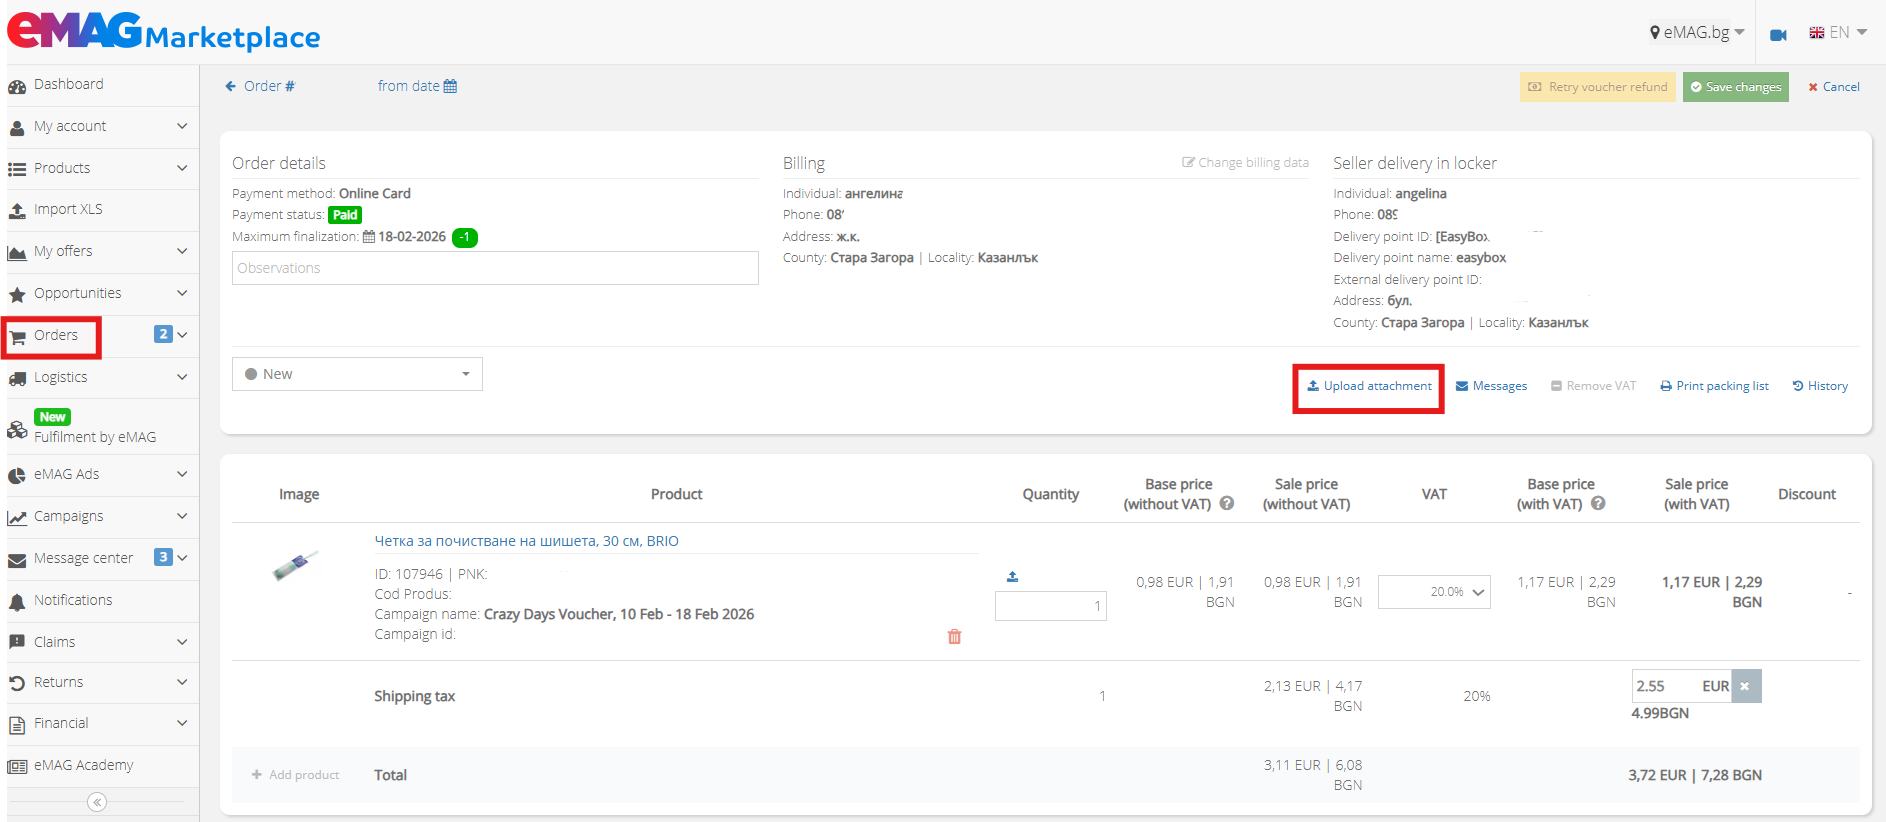
- In the Order Details page:
- Go to the Orders section.
- Click the Edit button in the Actions column.
- Above the product details section, you will find the Upload Attachment button.
- By accessing the Upload Attachment, you can select the desired document type for upload:
- Invoice – if you want to upload the invoice related to the order, this option is set as default when using the upload button.
- Warranty – if you want to upload the product warranty, you must select the Warranty attachment type from the available list. For orders with multiple products, you will first need to select the product for which the uploaded warranty will apply.
- Check the order details and click the Upload button.
- After issuing the invoice, it will be available in the customer’s account.

Display of documents uploaded for an order
- All documents attached to an order will be listed in the attachments section of the Order Details.
- The Attachment Type and Product Identifier columns help you distinguish between product-level attachments (warranties) and order-level attachments (invoices).

⚠️ Important:
- You can upload only one warranty file per product.
- If you upload multiple files for the same product, the last uploaded file will automatically overwrite the previous one.
- The accepted format for documents uploaded through this functionality is PDF.
Generating a reverse (storno) invoice:
- Go to the Orders section.
- Click the Edit button in the Actions column.
- At the bottom of the page, you have the Reverse invoice button available.
- Keep in mind that you cannot partially cancel a manually issued invoice from the platform. If only one product is returned from the order, you need to reverse the invoice and issue a new invoice containing only the active products from the order.
💡 Tip: The faster the invoices are uploaded to the client account, the lower the chances of receiving complaints from them because they do not have the invoice in their account.
Invoicing voucher orders
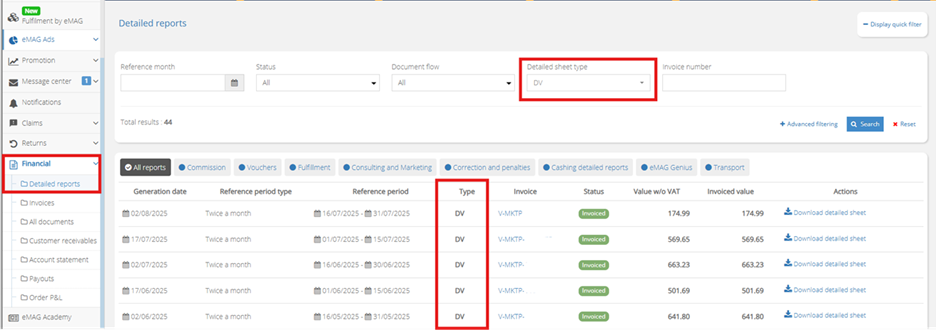
Invoices are issued according to the order and will contain both product details and gift card details. You will recover the gift card value from the voucher settlement (DV) that is automatically issued from the eMAG Marketplace platform and will be automatically offset against commission invoices.
Orders paid through gift cards can be identified by the acronym DV (discount voucher) and can be found in the Financial tab, under the Detailed reports option.
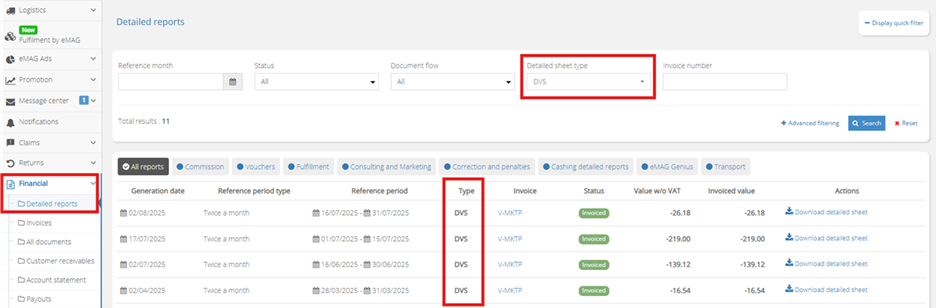
⚠️Attention! In case of return requests for products paid by gift cards, you do NOT need to refund the respective amount. This will be done automatically, the voucher will be reactivated and automatically sent to the customer, and for the initial voucher settlement (DV), a voucher reversal settlement (DVS) will be issued.
How to delete an invoice from an order
There are situations when you enter an incorrect invoice or one that requires some changes.
- Access the Orderssection from the Dashboard. Use the tabs available above the order list to quickly identify finalized orders, where you can also find the attached invoices.
- Once you have identified the order you want to edit, click the Edit button in the Actions column.
- In the new page that opens, you can see all the details of the order. In the invoices area, you have details about all the attached invoices.
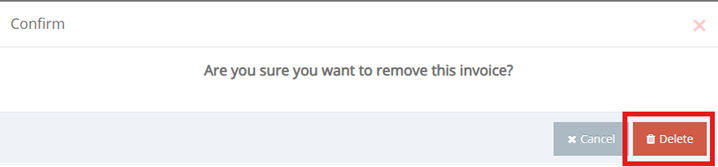
- To delete an invoice, click the Deletebutton available next to it.


- A window will open where you must confirm that you agree to delete the invoice. Click the Delete button and the invoice will disappear from the selected order and from the customer’s account.

Downloading invoices issued on the eMAG Marketplace platform
If you want to quickly download invoices issued on the platform:
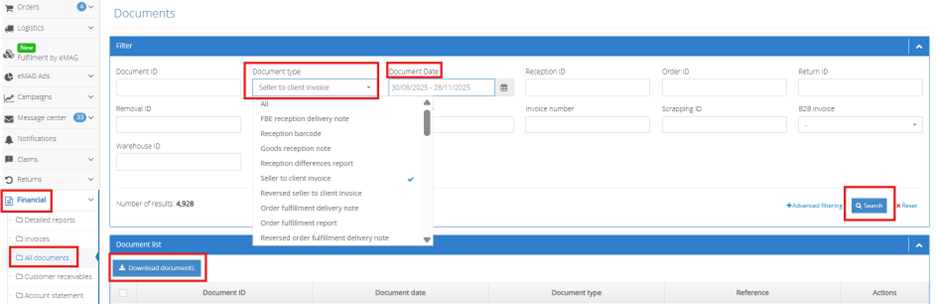
- Access the Financial – All Documentssection from the Dashboard. Here you have all the invoices issued on the platform using the invoice issuing service, as well as other types of documents.
- To download only the documents you need, use the filter area. Select the Document type – Seller to client invoiceand in the Document Date field select the time period for which you need the invoices.
- Press the Searchbutton and only the invoices that meet the parameters you set will be displayed.
- Quickly select all invoices using the check mark on the left of the invoice list and press the Download documents button.
After a few seconds, during which an archive with the selected invoices is generated, you can download the archive to your computer.


